Vue實(shí)現(xiàn)騰訊云點(diǎn)播視頻上傳功能的實(shí)現(xiàn)代碼
基于Vue+ElementUI+vod-js-sdk-v6,完成騰訊云點(diǎn)播視頻上傳功能
最近做的一個(gè)項(xiàng)目,需要用到騰訊云點(diǎn)播的視頻上傳!!寫一個(gè)盡可能詳細(xì)的博客供各位參考,歡迎指正; ok,下面進(jìn)入正題。首先是需要用到的依賴:ElementUI、vod-js-sdk-v6、axios
npm i vod-js-sdk-v6npm i axios
import vue from ’vue’import { Upload, Progress } from ’element-ui’vue.use(Upload)vue.use(Progress)
我采用了ElementUI的手動(dòng)上傳組件,比之自動(dòng)上傳用戶體驗(yàn)會(huì)更好一點(diǎn)
<template> <div id='upload_video'> <el-upload ref='upload' action='#' :http-request='uploadVideo' //自定義上傳 :accept=’accept’ :limit='1' //上傳的文件數(shù)量 :on-remove='handleRemove' //文件移除事件 :on-change='handleChange' //文件改變事件 :auto-upload='false'> <el-button slot='trigger' size='small' type='primary'>選取視頻</el-button> <el-button size='small' type='success' @click='submitUpload'>點(diǎn)擊上傳</el-button> <el-progress :text-inside='true' :stroke- :percentage='progress' status='exception'></el-progress> <div slot='tip' class='el-upload__tip'>只能上傳mp4文件,且不超過500M</div> </el-upload> <video :src='http://www.cgvv.com.cn/bcjs/videoURL' autoplay></video> <img style='width:90px;height:160px;display:none'> </div></template>
接下來是一些變量的定義 以及sdk的引入
import TcVod from ’vod-js-sdk-v6’export default { data () { return { // 文件列表 fileList: [], // 上傳成功后的地址 videoURL: ’’, // 進(jìn)度條百分比 progress: 0, // base64圖片地址 注:這個(gè)是項(xiàng)目需要設(shè)置一個(gè)默認(rèn)的視頻封面,不需要的忽略就行 imgBase: ’’, // 上傳視頻獲取成功后拿到的fileID【備用】 fileId: ’’ } }}
最后是具體邏輯
methods: { // 獲取簽名 這里的簽名請求是由后端提供的,只需要拿到后端給的簽名請求即可 getVodSignature () { const url = ’/bpi/artworkMaking/findSingature’ return this.$axios.post(url).then(function (response) { return response.data.data }) }, // 文件列表改變時(shí) 將文件列表保存到本地 handleChange (file, fileList) { this.fileList = fileList }, // 點(diǎn)擊上傳時(shí) submitUpload () { if (this.fileList.length < 1) return this.$MessageBox(’請先選取視頻,再進(jìn)行上傳’, ’提示’) this.uploadVideo() }, // 自定義上傳 uploadVideo (e) { // 當(dāng) console.log(this.fileList[0].raw) if (this.fileList.length < 1) { window.alert(’您還沒有選取文件’) } else { //必須以函數(shù)的形式返回 sdk參數(shù)限制 const getSignature = async () => { const data = await this.getVodSignature() return data } const tcVod = new TcVod({ getSignature: getSignature // 獲取上傳簽名的函數(shù) }) // 獲取通過elementui上傳到本地的文件 因?yàn)閰?shù)類型必須為file 不能直接以對象的形式傳輸 const mediaFile = this.fileList[0].raw const uploader = tcVod.upload({ mediaFile: mediaFile }) // 監(jiān)聽上傳進(jìn)度 uploader.on(’media_progress’, info => { this.progress = parseInt(info.percent * 100) }) // 上傳結(jié)束時(shí),將url存到本地 uploader.done().then(doneResult => { // 保存地址 // console.log(doneResult) // console.log(this.fileId) this.fileId = doneResult.fileId this.videoURL = doneResult.video.url // 將視頻的第一幀保存為封面 不需要封面的可以直接忽略掉以下代碼 const canvas = document.createElement(’canvas’) const img = document.getElementById(’video_img’) const video = document.getElementById(’video’) video.setAttribute(’crossOrigin’, ’anonymous’) canvas.width = video.clientWidth canvas.height = video.clientHeight video.onloadeddata = (res) => { canvas.getContext(’2d’).drawImage(video, 0, 0, canvas.width, canvas.height) const dataURL = canvas.toDataURL(’image/png’) img.setAttribute(’src’, dataURL) // 拿到base64的字符串,并保存到本地 this.imgBase = dataURL.split(’,’)[1] } }) } }, // 點(diǎn)擊刪除時(shí) handleRemove (file, fileList) { console.log(file, fileList.length) } }
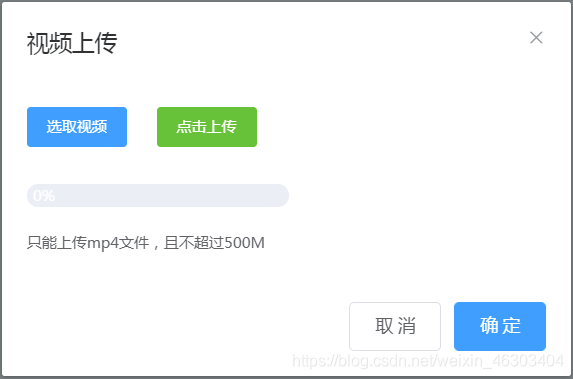
大功告成,需要其他功能的小伙伴請自行參考騰訊云官方demo,去騰訊云文檔官網(wǎng)看,不要看npm!!! 最后附上成品樣式圖0.0,右邊空白是我預(yù)留的視頻預(yù)覽區(qū)域
總結(jié)
到此這篇關(guān)于Vue實(shí)現(xiàn)騰訊云點(diǎn)播視頻上傳功能的實(shí)現(xiàn)代碼的文章就介紹到這了,更多相關(guān)vue騰訊云點(diǎn)播視頻上傳內(nèi)容請搜索好吧啦網(wǎng)以前的文章或繼續(xù)瀏覽下面的相關(guān)文章希望大家以后多多支持好吧啦網(wǎng)!
相關(guān)文章:
1. 低版本IE正常運(yùn)行HTML5+CSS3網(wǎng)站的3種解決方案2. 利用CSS制作3D動(dòng)畫3. 使用Spry輕松將XML數(shù)據(jù)顯示到HTML頁的方法4. 測試模式 - XSL教程 - 55. html5手機(jī)觸屏touch事件介紹6. 用xslt+css讓RSS顯示的跟網(wǎng)頁一樣漂亮7. 《CSS3實(shí)戰(zhàn)》筆記--漸變設(shè)計(jì)(一)8. JSP的Cookie在登錄中的使用9. xpath簡介_動(dòng)力節(jié)點(diǎn)Java學(xué)院整理10. 讀大數(shù)據(jù)量的XML文件的讀取問題

 網(wǎng)公網(wǎng)安備